Short Alfheim-based map serving
as a sidequest for Kratos and Atreus.
Overview
This map is a 15-20 minute sidequest map for God of War. I utilize the structure of a standard GoW stage to form the beats of this project. A careful balance provides solid pacing and interest throughout the map. I framed shots and used environmental storytelling to get the player from POI to POI.
Setting and balancing beats for the level was a new challenge. All things considered, I decided to chain the beats as follows: 1) Exploration 2) Combat 3) Narrative 4) Puzzle 5) Combat (Boss)
I chose this order to maintain pacing while breaking up some of the more monotonous gameplay. While this creates a linear path through the level, the puzzles and branches throughout compensate with variations in terrain and action. I will talk a bit more below about how I rewarded each beat of the level.
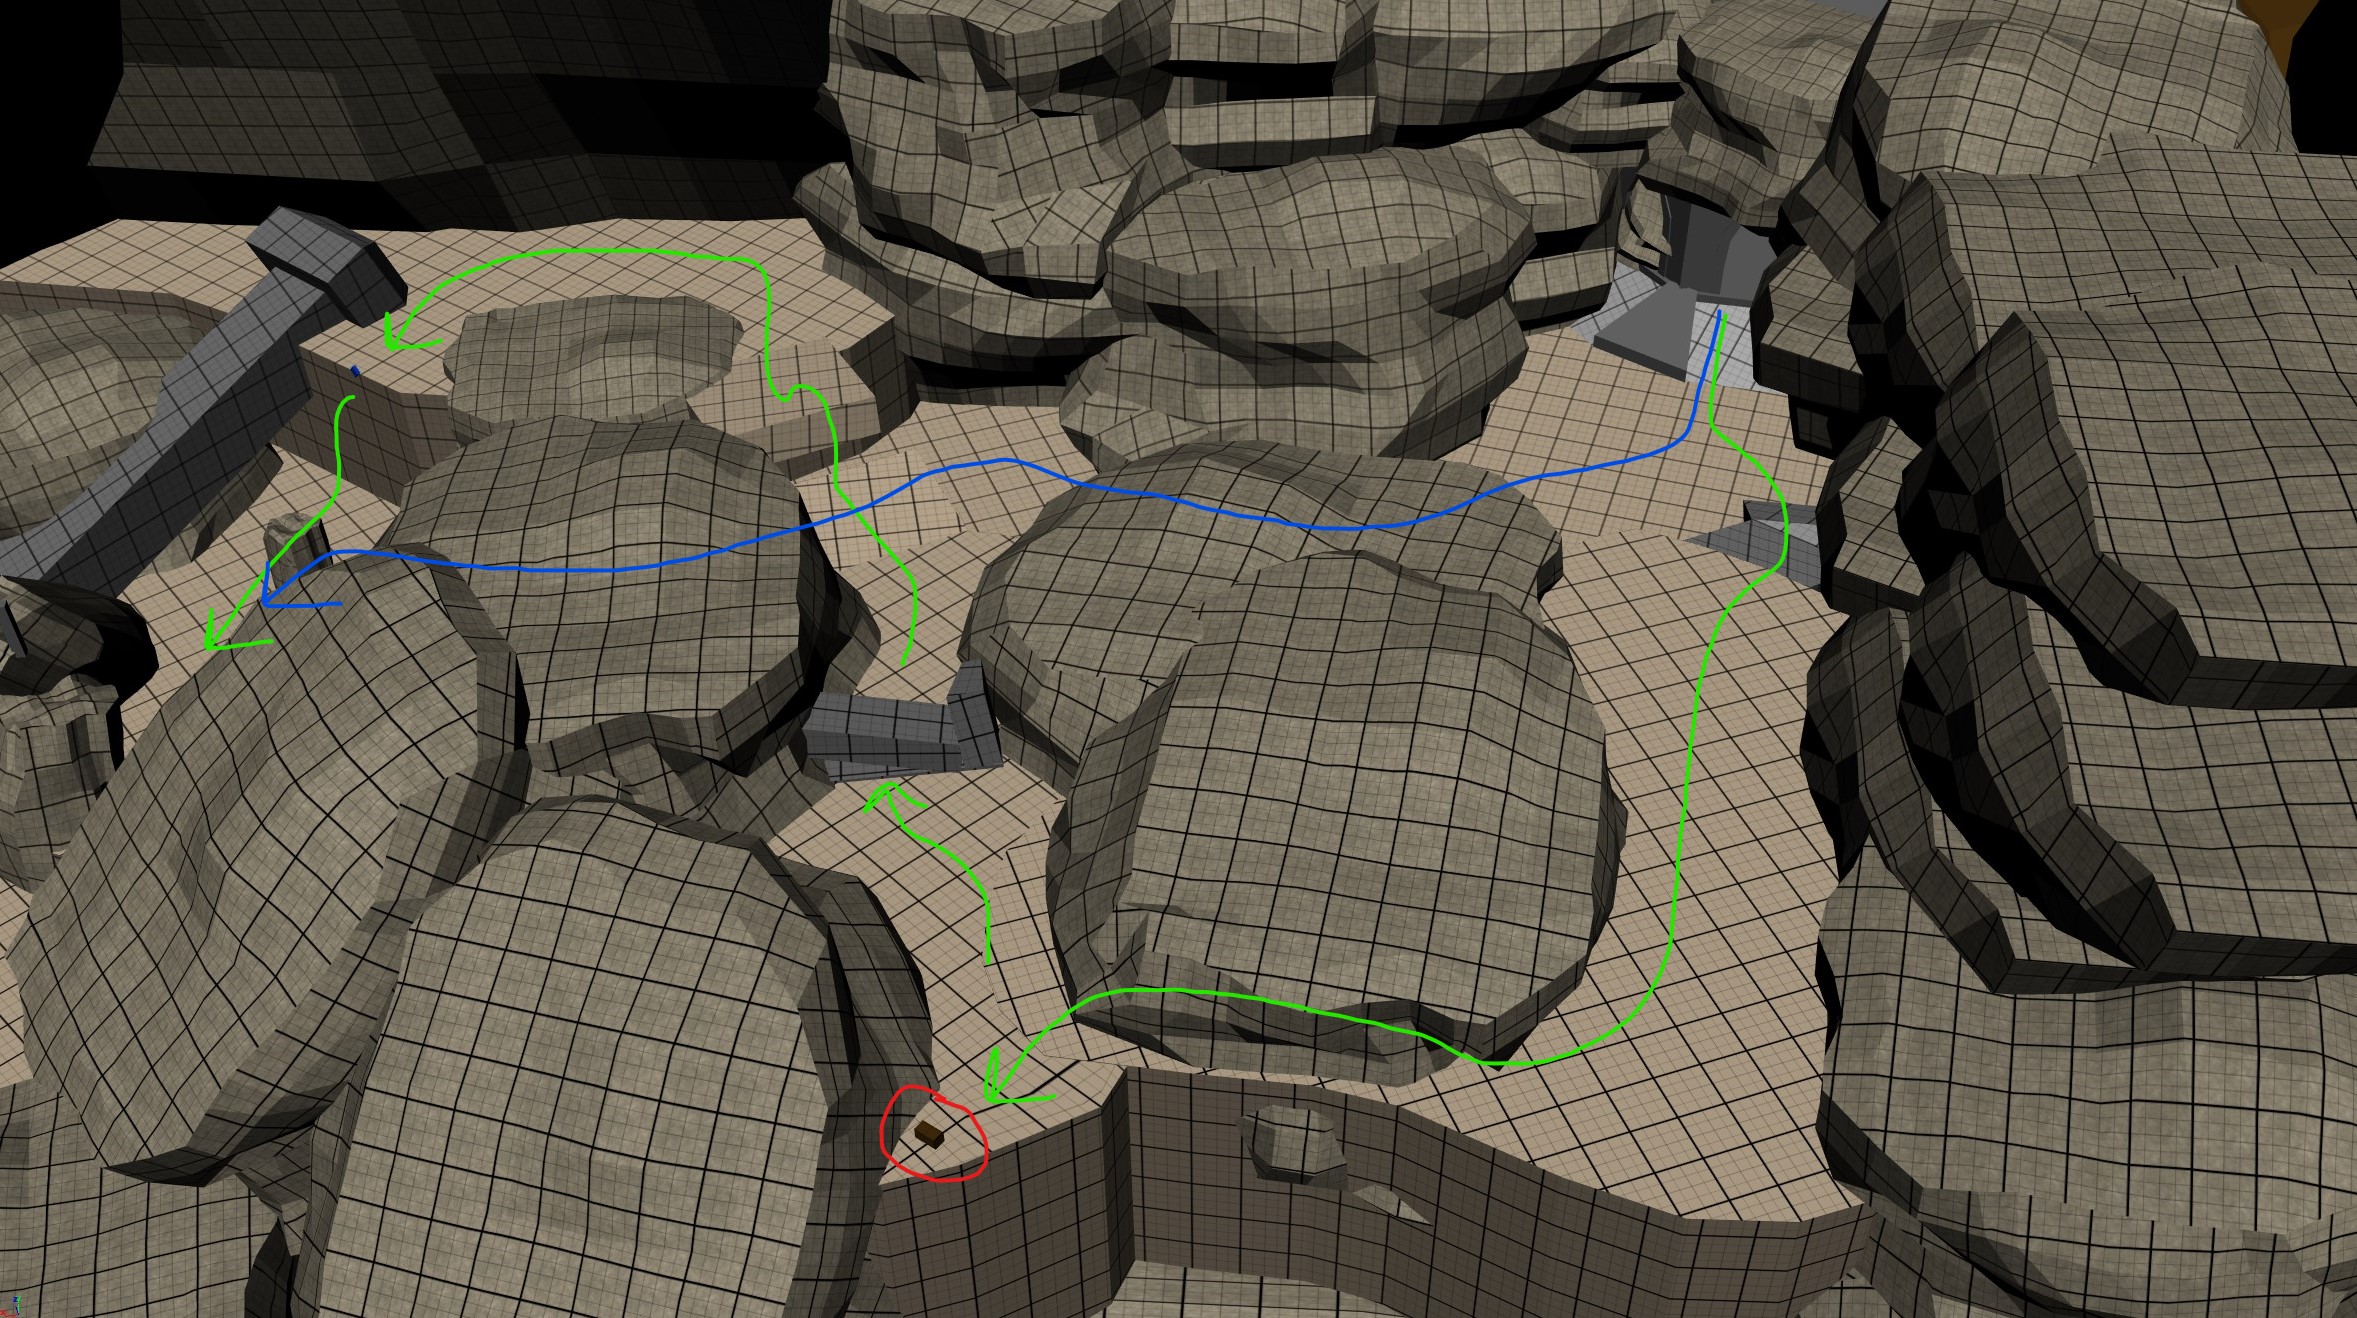
Setting the Scene
From the beginning, the player is given a choice of two pathways. Neither is hidden, so a small amount of exploration leads to a ledge Kratos can shimmy across to access a small chest of loot. This setting also provides an overview of the descent and draws the player's eye to the focus of the sidequest - the ruined tower at the bottom.
This pathway is highlighted with a stairway for that reason. Using a few traversal mechanics, Kratos is able to continue on the upwards branch before rejoining the bottom path between the boulders on the ground level. There is very little action coming into this area, and that changes after a few dropdowns into the next beat.
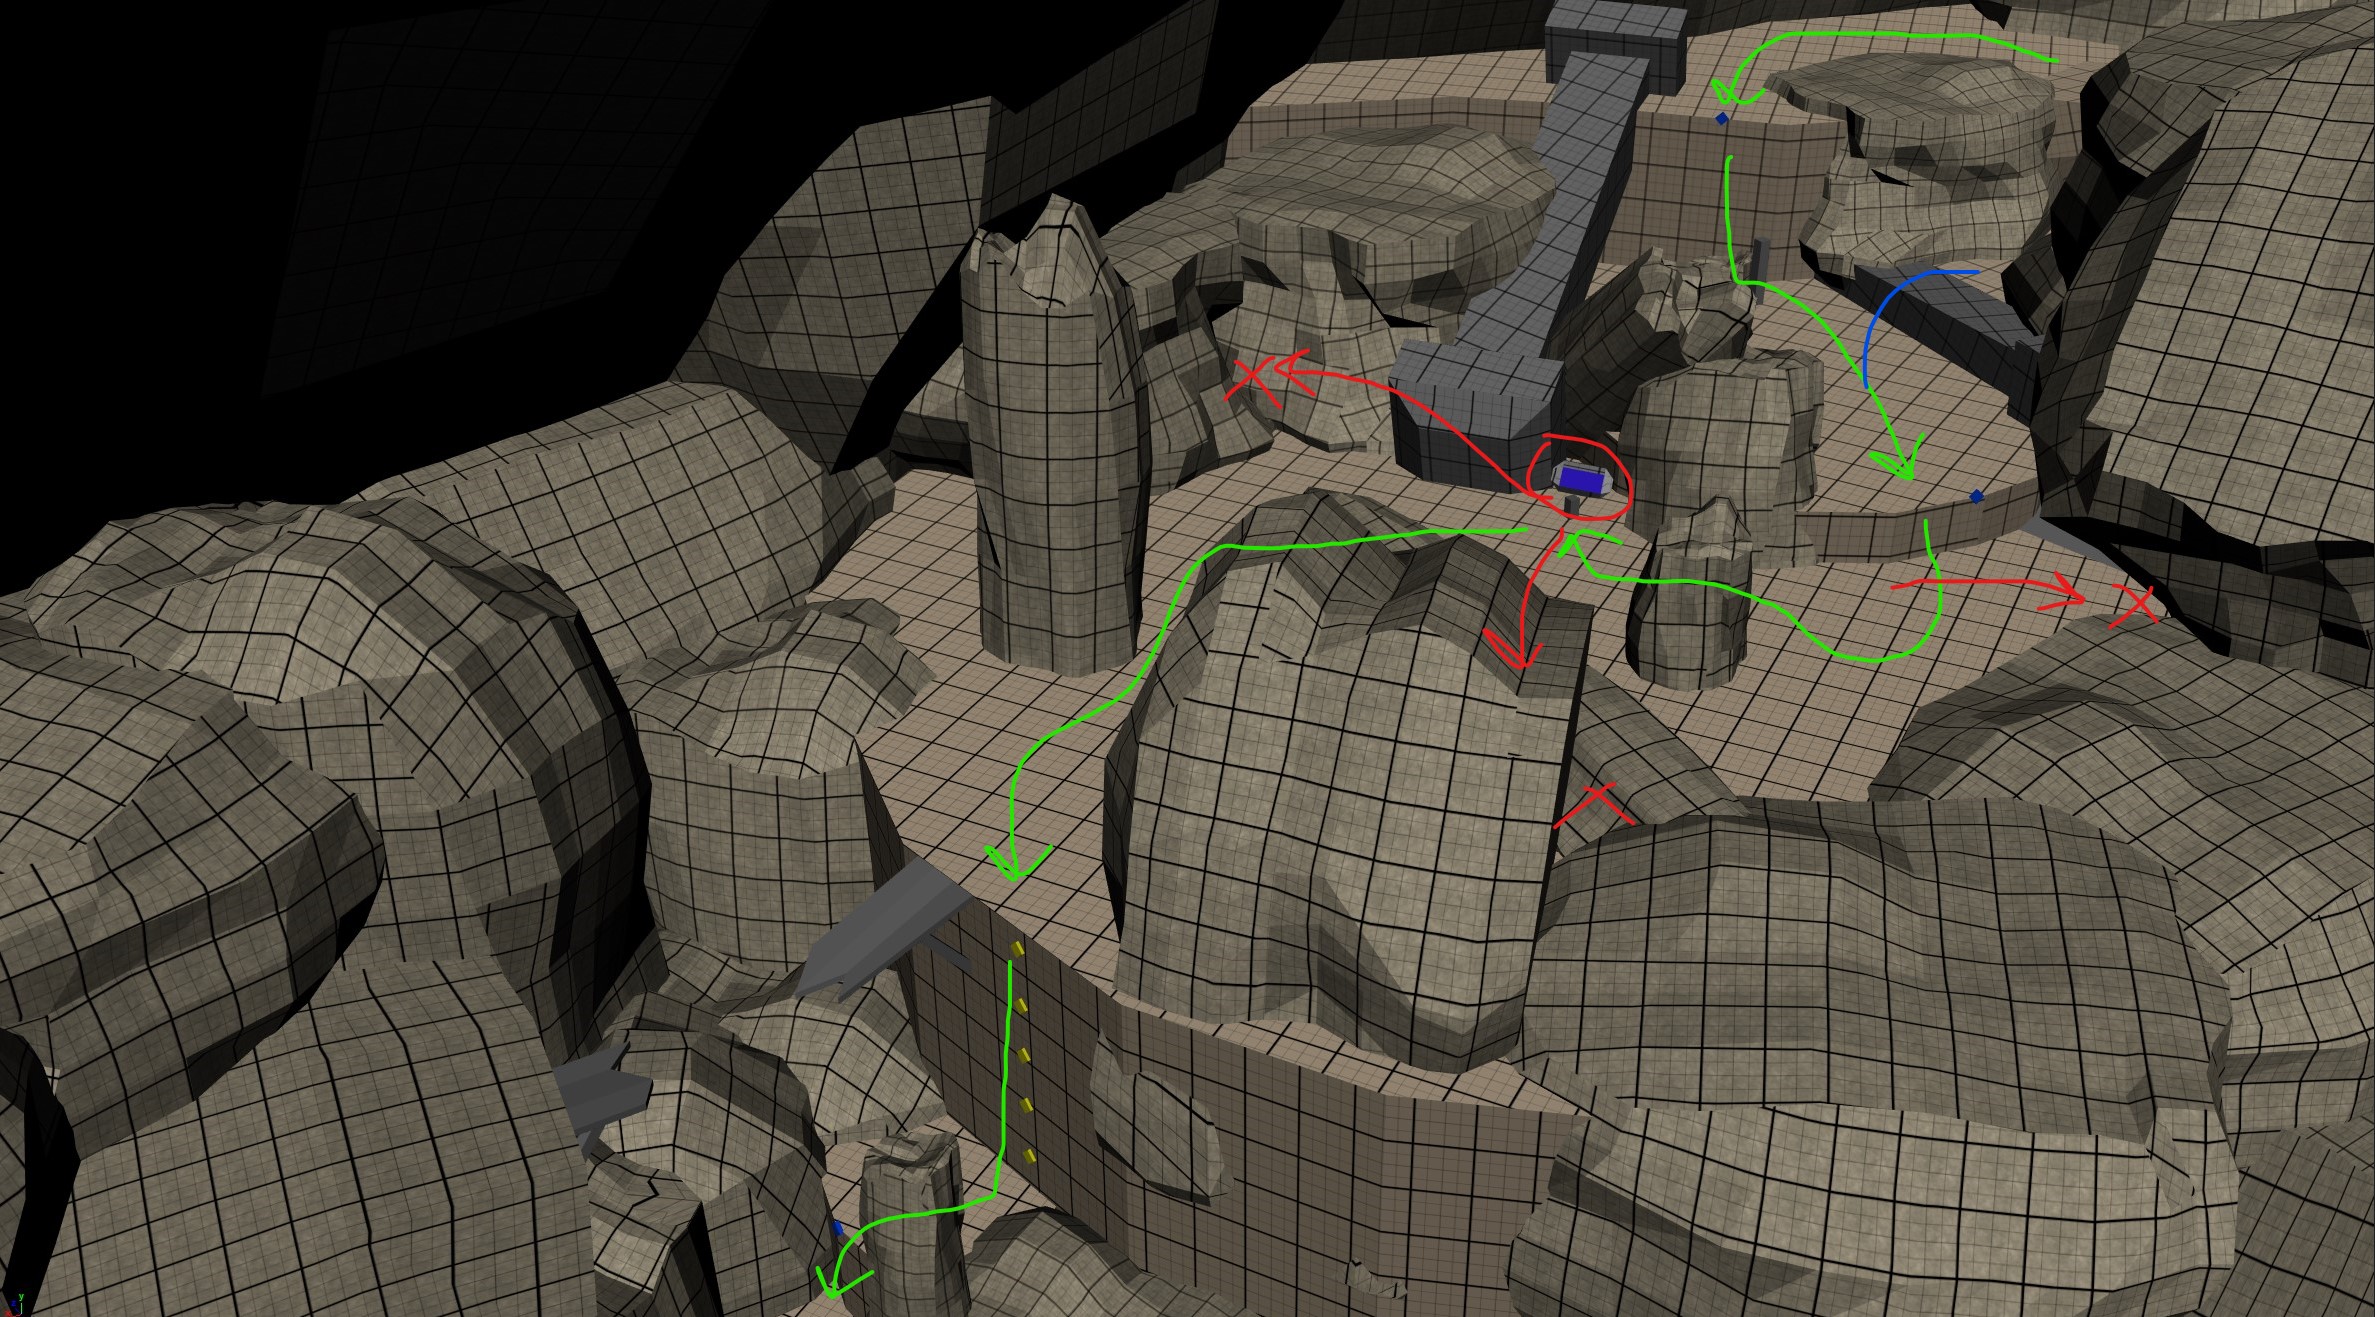
Scaling the Cliffs
After the intial area, the paths converge into a small area with several large slagmites and bits of ruined constructions strewn about. A small combat enemy encounter gets the action going.
After the fight, Kratos or Atreus will comment on one of the bits of ruins that can bounce Kratos' Leviathan Axe. This leads into an easy puzzle that opens the path up down into the chasm below.
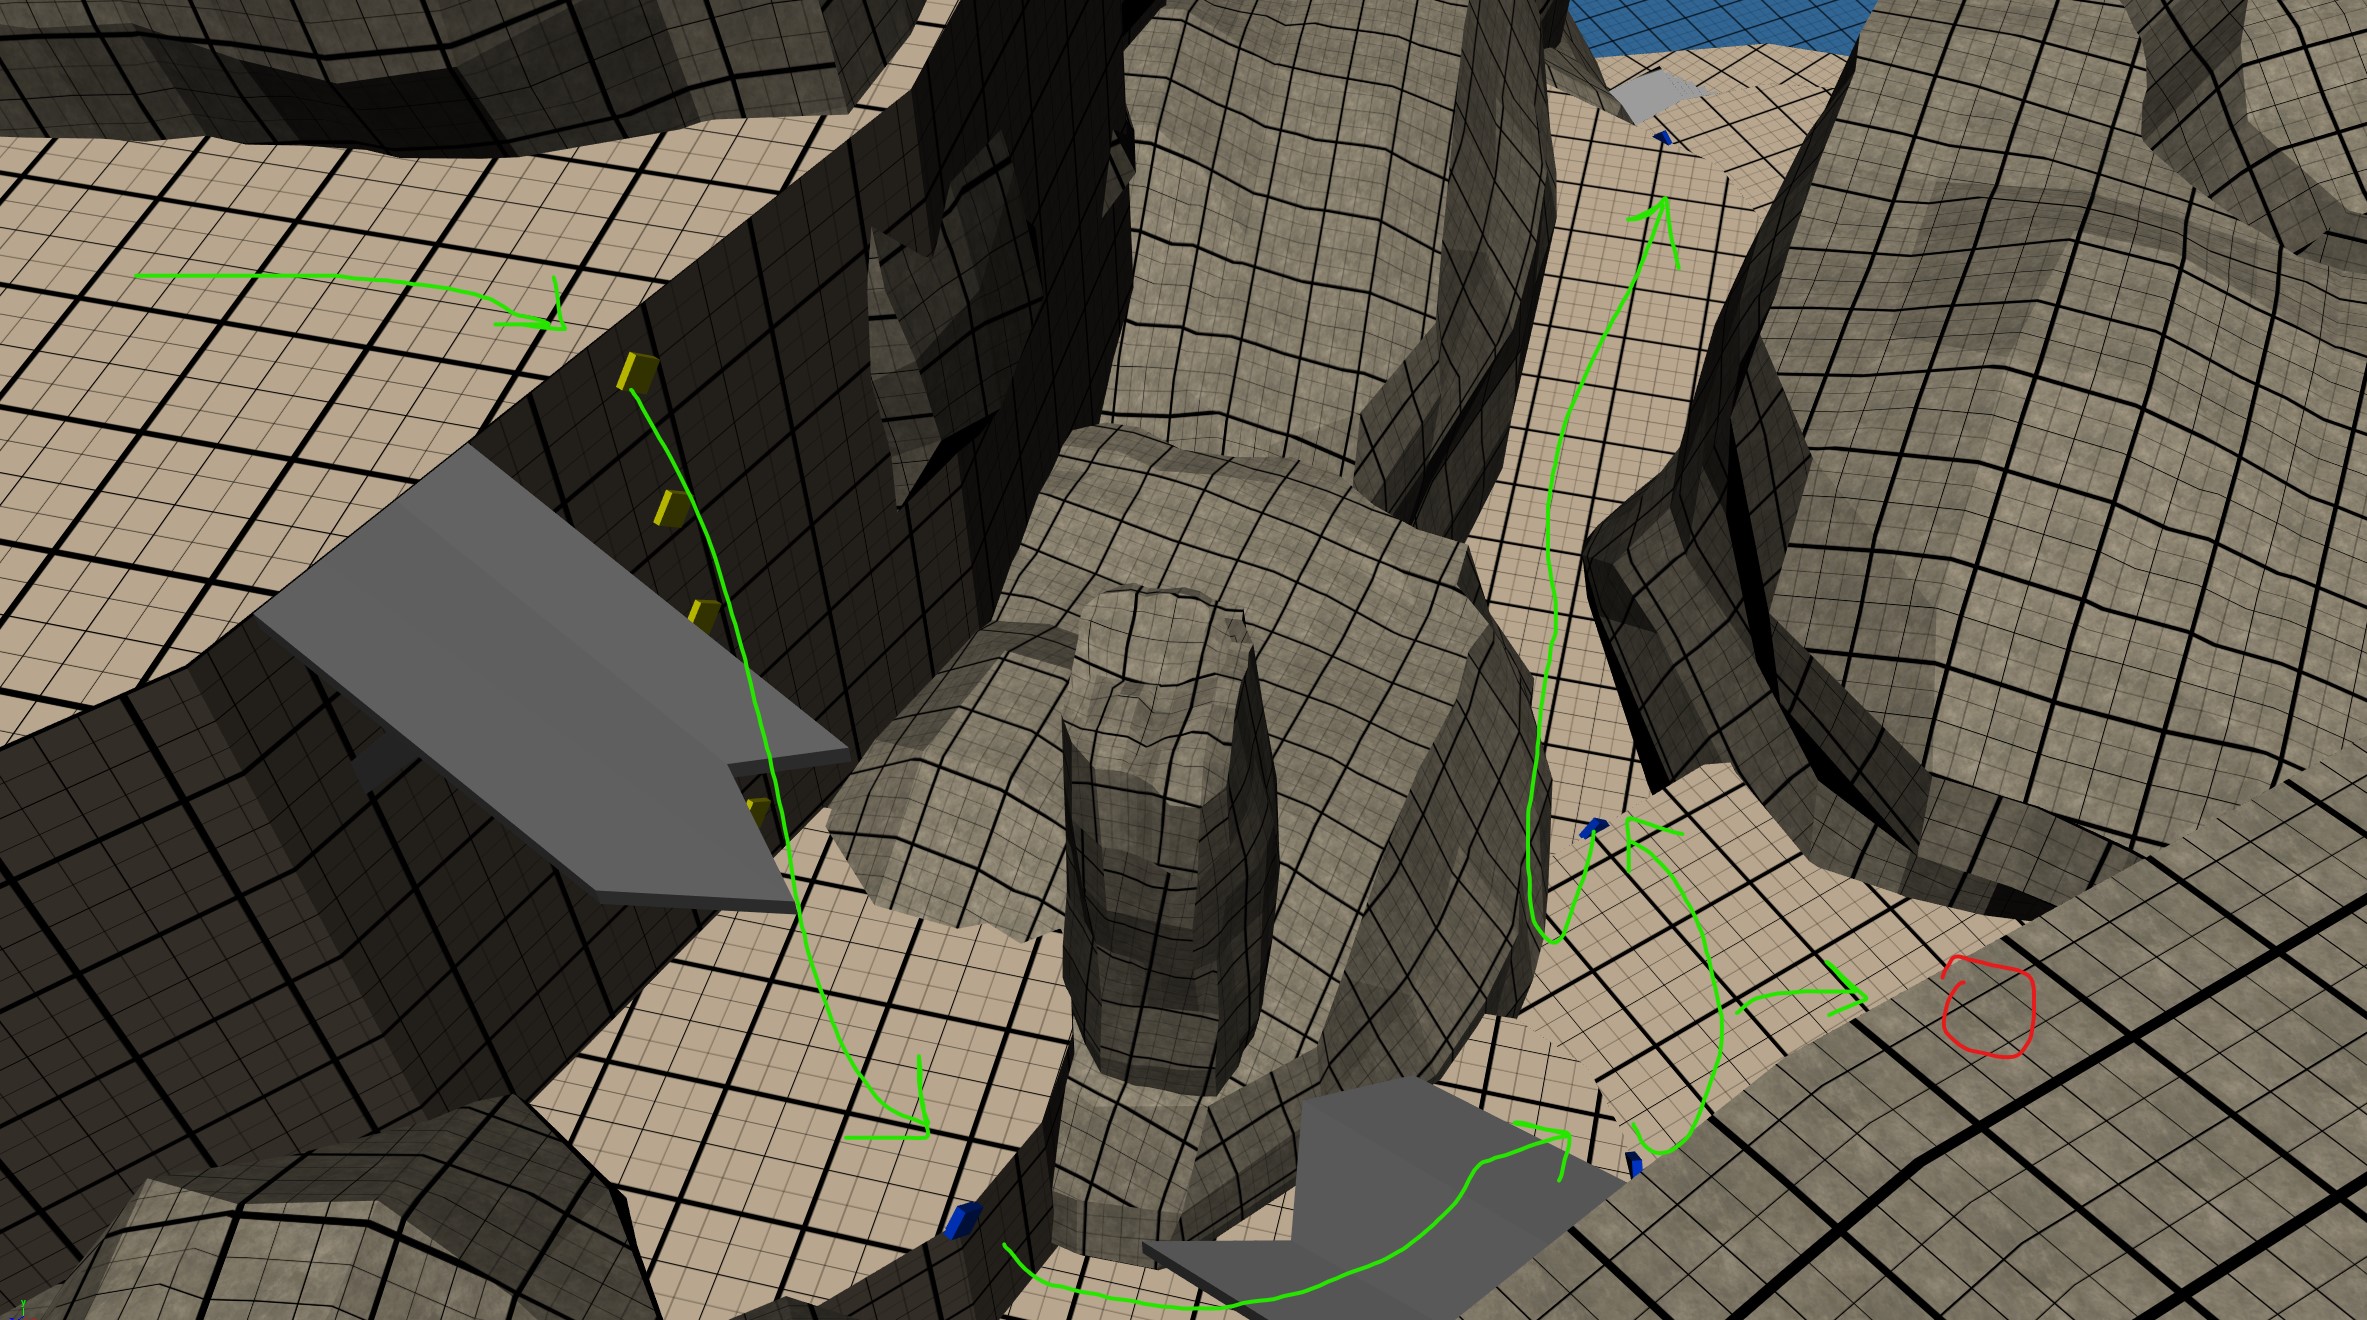
The player will be using a plethora of Kratos' and Atreus' navigation abilities to descend into the ravine below them, since the bridge is destroyed. This becomes a suitable moment to relax from the combat and allows the characters to banter or prod a narrative as they approach the entrance of the ruins.
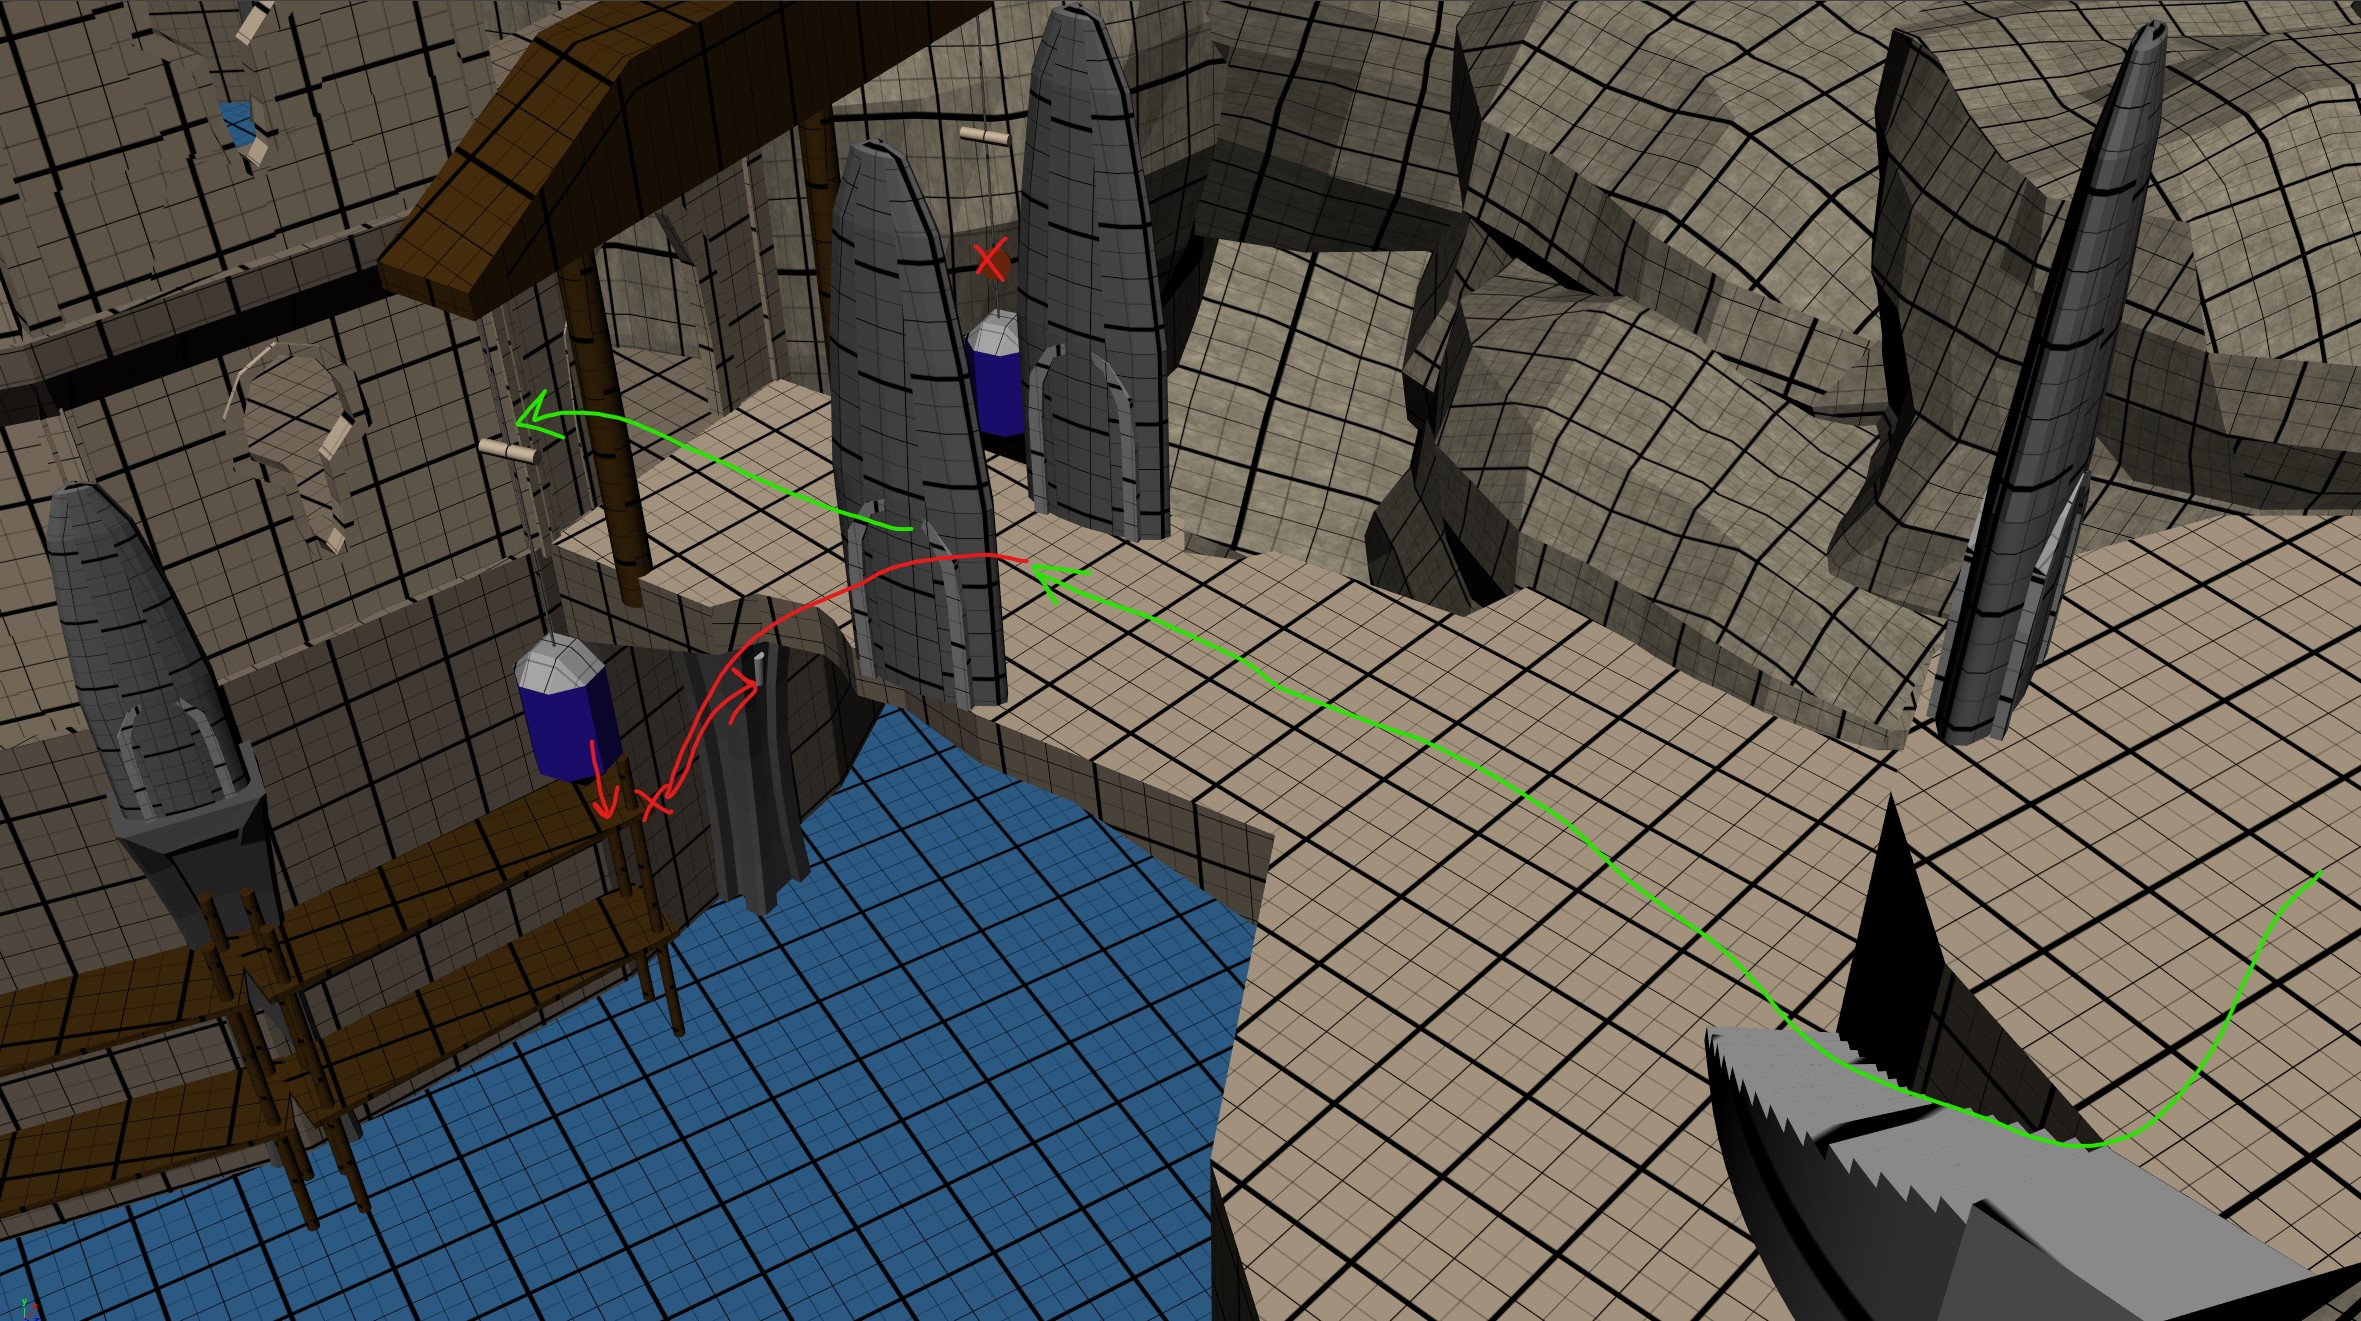
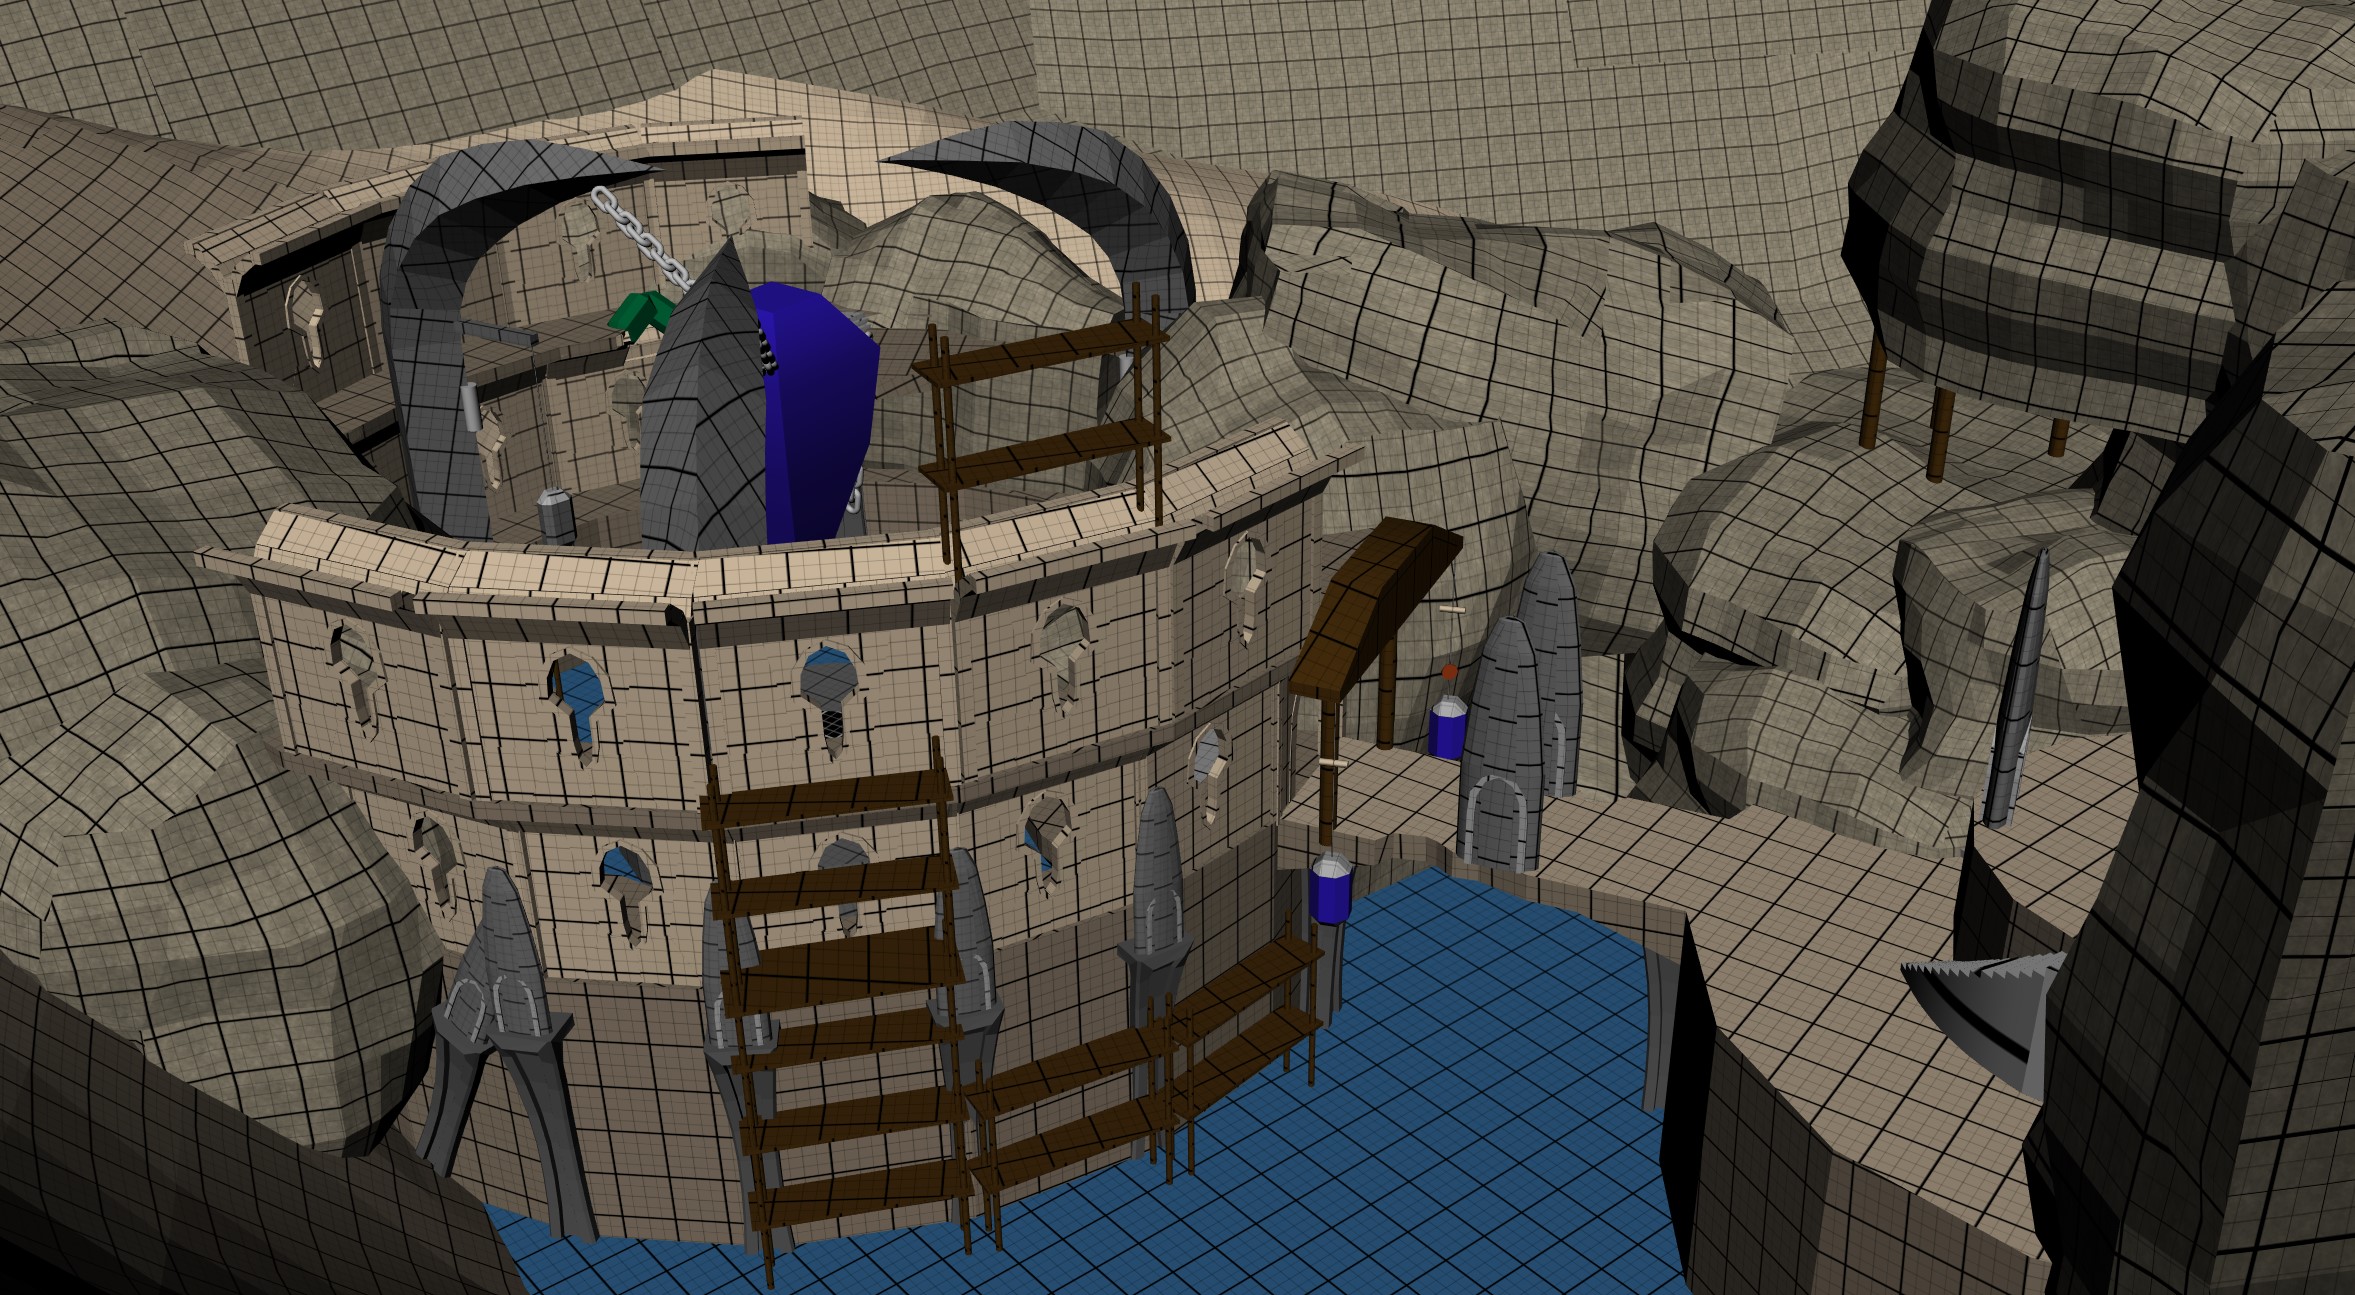
Into the Tower
The entrance to the ruins is initially blocked. Colored signposts guide the player to shatter a weight, which drops the counterbalancing stone below the bridge. In doing so, a throwing angle is created to break a target sitting under the bridge that drops the door.
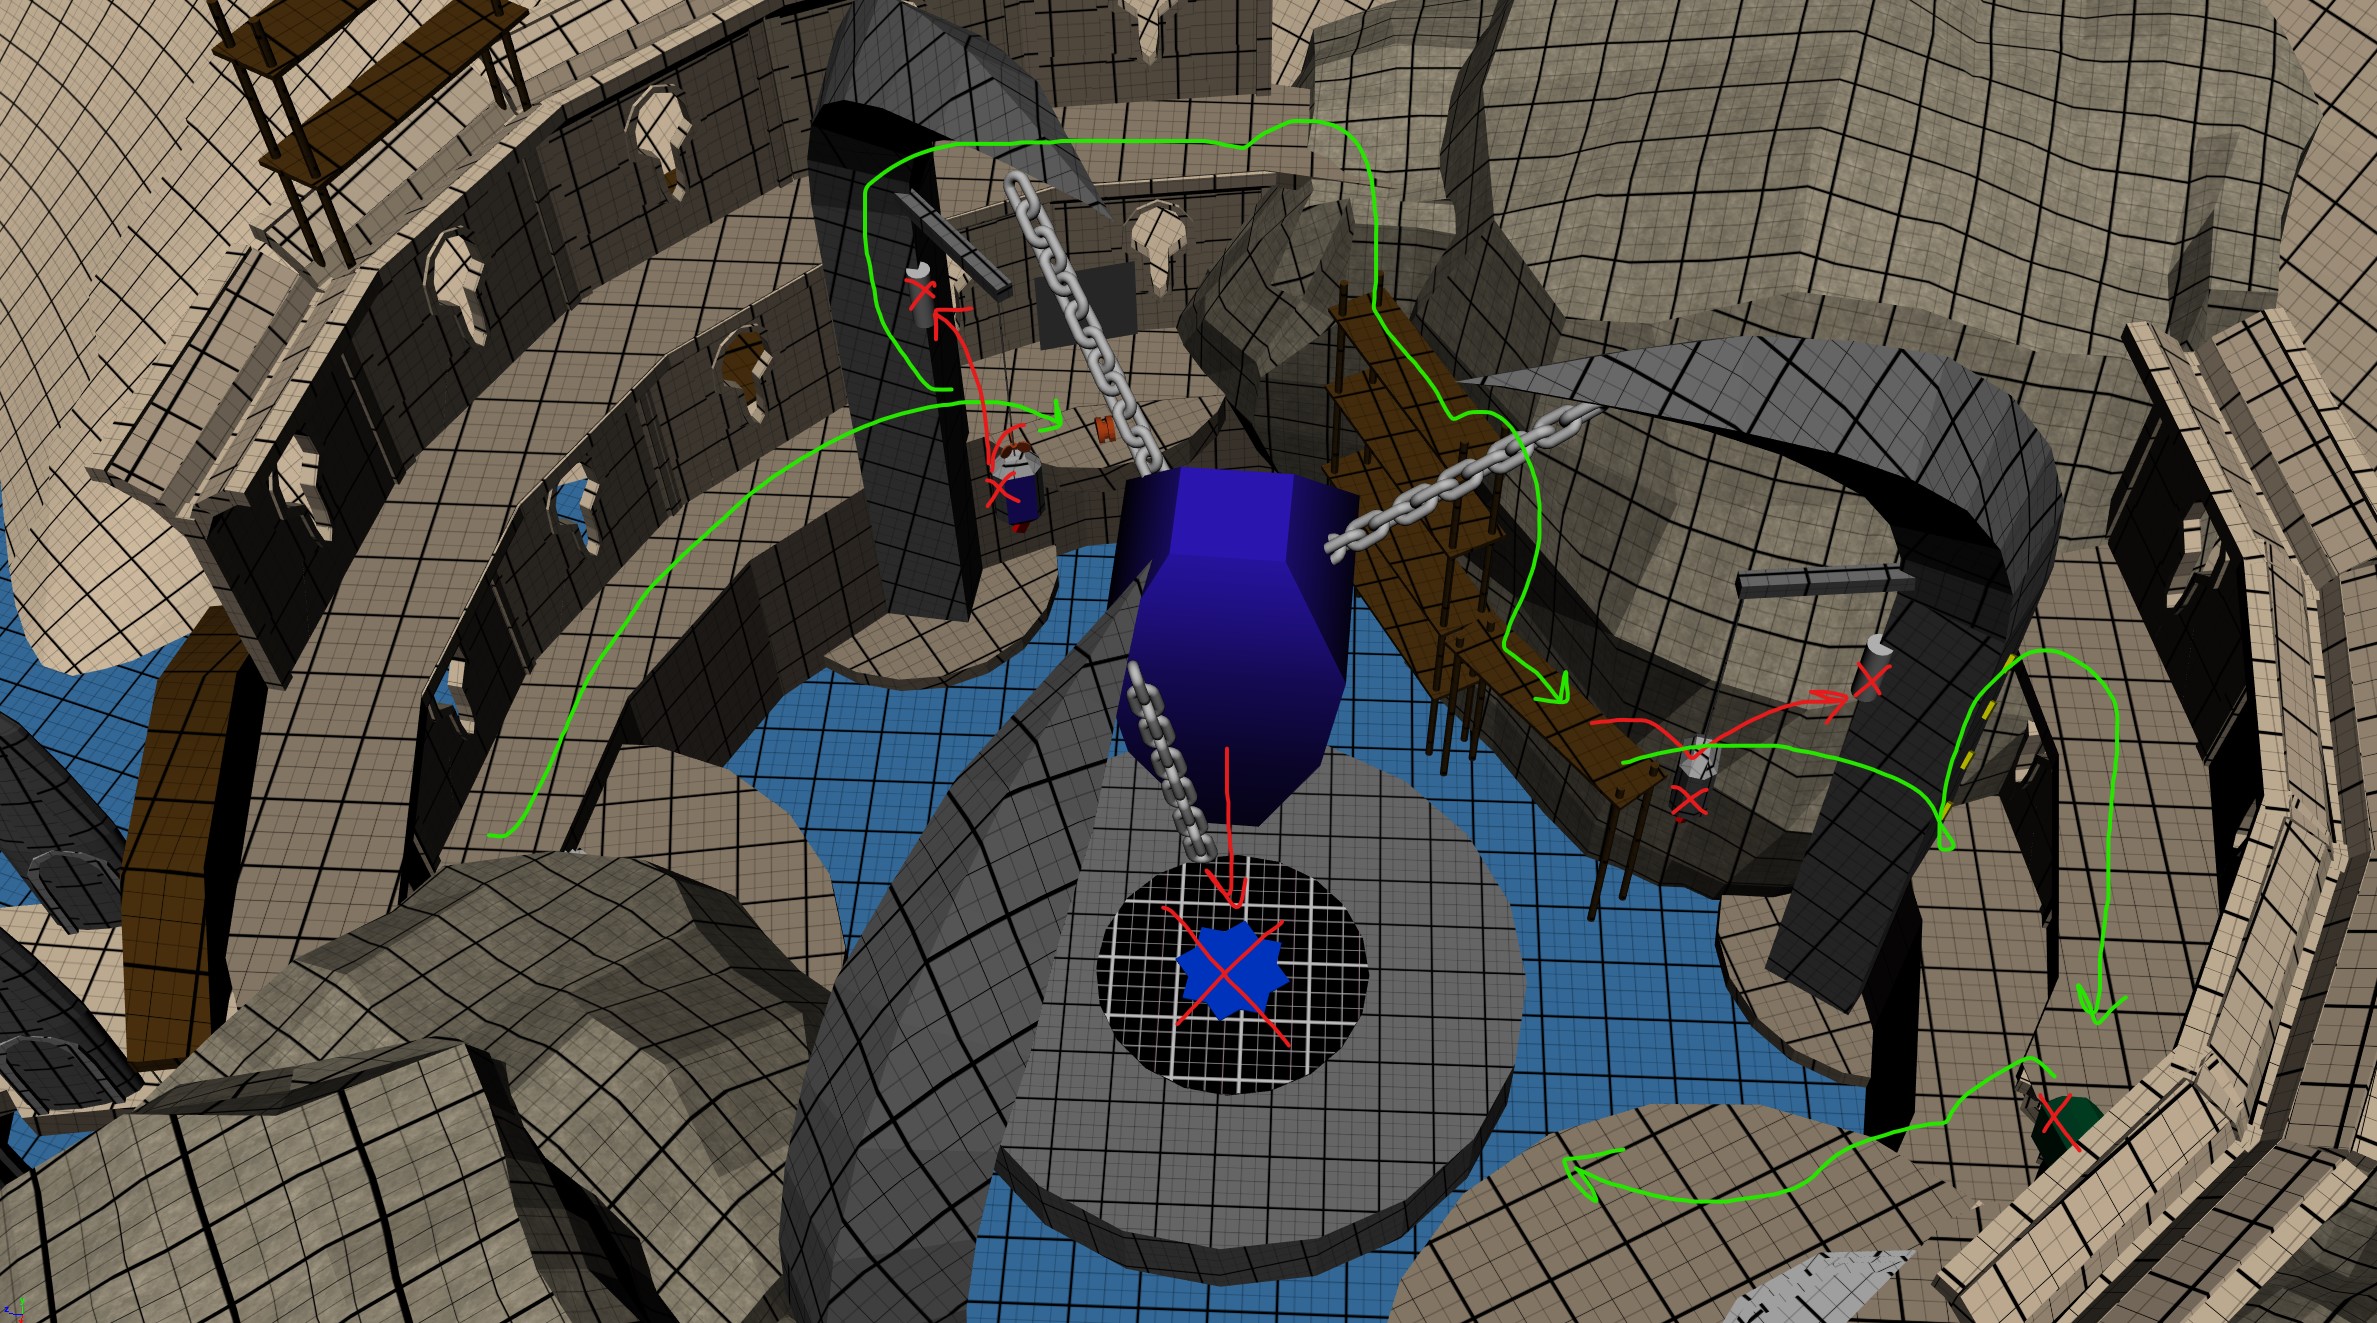
On entry, the squad is shown the Draugr Hole at the bottom of the tower, which is their goal to eliminate. Another series of puzzles along the rim whose mechanics are foreshadowed by the entry puzzle guides the player around to break the glowing targets mounted on each finger holding up the chains. The player will be tested on using multiple navigation tools demonstrated earlier in the level to access the targets.
When the targets are all shattered, the crystal is dropped onto the Draugr Hole. This triggers the final fight of the sidequest and an escape sequence through the waterway at the base of the ruins.